
20 Foot Delta
by: Dennis & Arlene IscheThis is a tale of what, when and how...
What started the ball rolling...
When it started rolling and
How we rolled it!!
The Idea...
It all has to start somewhere and the two pictures below are that starting point.
I have had them kicking around for a number of years and really didn't know what to do with them.
When I first got back into kiting, a round rok I found plans for would suit... but
how could I fly two at the same time? This
is when I saw two 20 foot deltas... One by Carl Bigras and one by
Spence Wikel. I even found the plan for a Dan Liegh 6 meter delta...
Decision made


The Specs...
Size - 20 feet, wingtip to wingtip by 10 feet nose to tail
Sail material - 3/4 oz. Challenger Ripstop Spinnaker nylon
Reinforcing - 4 oz. dacron
Leading edge pockets - 4 oz by 3 inch wide dacron
Leading edge Frame - FL 610 and FL505 Glasform spars
Spreader - FL 610 Glasform rod.
Flying line - 500 lb test Braided Dacron
From Here To There...
OK... I had the pictures and the plan... Hey wait a minute I have a scanner AND am a
CAD draftsman... Eureka!
I scanned the pictures and got then into AutoCAD and drew up the plan and started to play... With all the parts laid out and seams shown I resized the sun and moon to match in size and located them on the sails. The following diagram shows my end result. Yes I scanned the stars and drew them in too!
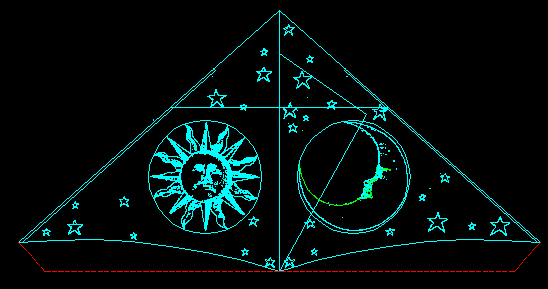
The plan above is drawn to scale so I can dimension it and lay out a template. Plotting a large template was out of the question so a page with dimensions, a kitchen floor and tape measure and straight edges were the way to do it... Oh yes.. lots of masking tape!!!
On the diagram above the red line at the bottom was the original sail for the kite but was you can tell I "clipped" it to give it a rakeish look... AND a higher wind range. I may yet make detatchable pieces to velcro along the trailing edge to make it fly in lower winds.
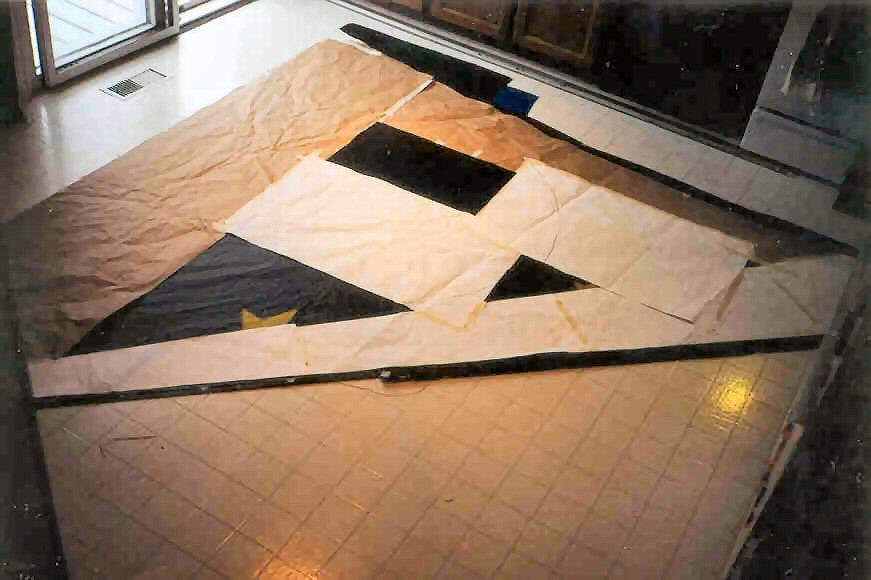
Above is a shot just before we started to cut the sails to their final shape. It was a ton of fiddling around to get it to this stage. I think we cleared our kitchen at least half a dozen times or more in the past year and a half to get to this point. We still cleared it at least twice after this to get the sails and keel put together for sewing. We ate in the living room many times!
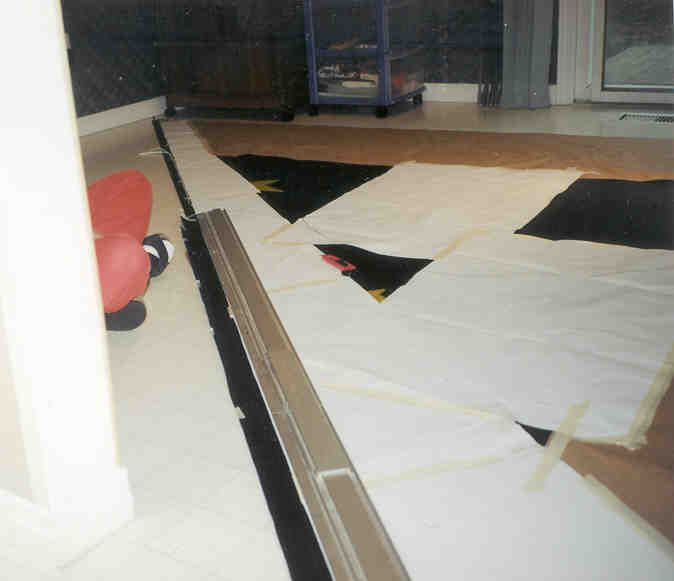
How do you cut the leading edge? Very Carefully!!! ;))
Here Arlene is moving a thin cardboard cutting pad along as we have a skill saw guide to keep the line straight. Thankfully no slips and no cuts in the flooring!!
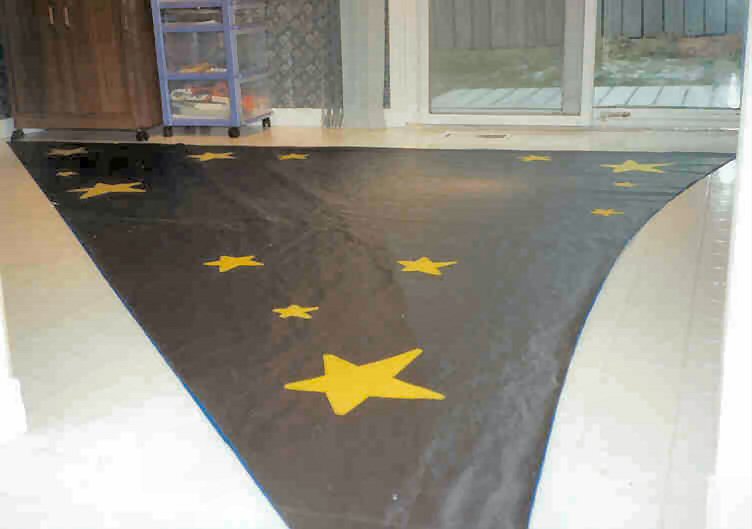
You can see a couple things on this shot above. First it is the back of one of the sails (the other is face up under it) and we had sewed on the stars first before cutting the sails to final size. We saved the sun and moon till after this stage. That means we made up the two larger appliques separately and attached them on as one piece. Worked amazingly well. A lesson learned from our LarryBoy Rok. Also the sails were so big they went out the kitchen door and started down our hall. Made for some interesting layout problems. Note the straight leading edge and curved trailing edge. The curve was done with two FL505 rods and a string. Made a bow and laid it down on the template and drew it on.Arlene thought this was quite crazy until I actually drew the line on the template.
In The End...
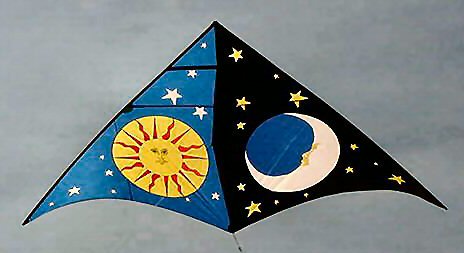
After all that sewing and cutting and fitting and sweating and nashing of teeth it was time to get it out and toss it in the air. Well toss isn't a word that really fits... You let the wind take it out of your hands and then hang on real tight and feed out the line slowly trying to avoid line burn! This baby pulls like a mule and will let you know in no uncertain terms when the wind is "ON". ;)
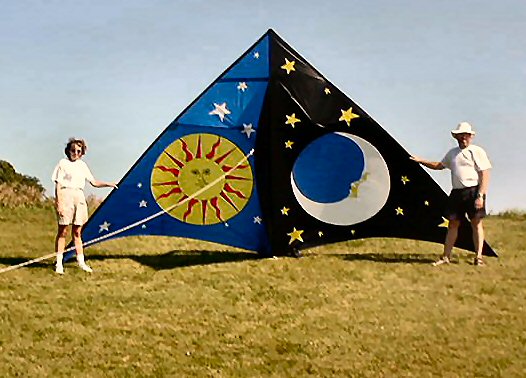
The TEAM... My wife Arlene and myself at our moment of triumph. A project a long time coming and hugely satisfying when it is now done.
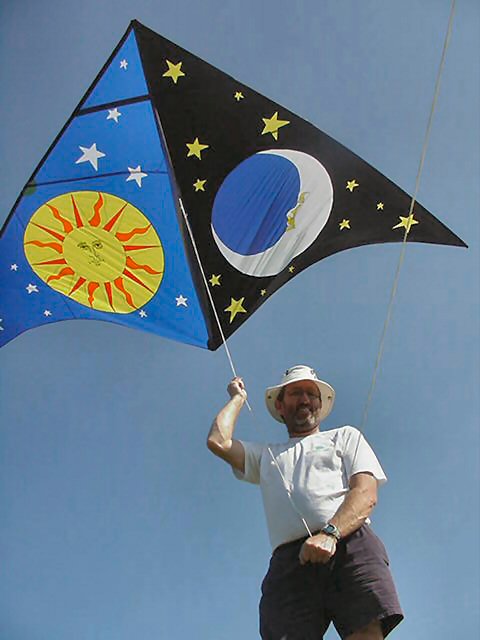
Finally the man and his machine... I don't think that grin will be gone for quite some time. It is still there as I sit here and type all this out for you all.
Hope you all enjoyed our journey. It has been a long one but now it is time to show off.
See ya on the flying field!!!