
The following are some hints and things to consider as you get started:
Among the options you have here are using two different, solid colours, and combining a solid colour with a variegated. If you don't feel you are a strong colour knitter, I'd suggest knitting a few more sample squares, and playing with the colours you are thinking about using. In general, I find that the darker of two solid colours looks best as the garter welt; and, when using a solid and a variegated, the solid looks best as the GW. But, as with everything, YMMV, so try it out to see what pleases you most.
I don't cut the yarn at all, just carry the yarn I'm not using up the side and swap it as I need to. It makes it a little fussier to work the slipped stitch at that side, but it's not bad, just try not to pull it too tight as you work up.....
You may by now have realized that there are a number of options to joining modules together, and whether you cast on/pick up or pick up/cast on; and what direction you move in from your original module, all may make a difference in which direction your mitres end up. This is Not A Bad Thing -- it gives you the opportunity to play with pattern as well, something you may well want to do to obtain the most interesting results.
David Xenakis of Knitter's has produced a file of possible garter square patterns generated by computer.....if you hunt around the downloads section of their website you will stumble across it.....I'll confess I have been unable to down load it recently, but I have seen it, it's interesting for the number of variations that are involved).
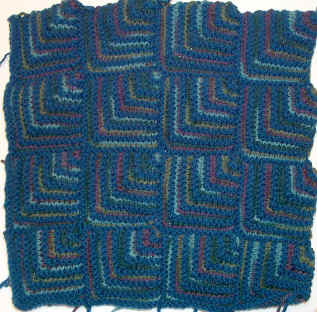
For the pillow we're working on, I've set my first module in the bottom left hand corner, and am moving from left to right. I've done four modules on the first row, then moved back to the far left and added another module on top of my original module. This means that all of my mitres are going in the same direction.
The following chart will show you the order in which to work the modules:
When you're finished, your pillow top will look like this (okay, it'll look a lot better than this, I had some problems getting a picture of the durned thing....).
Next, you can finish the pillow back to match -- just knit another one exactly the same as this one. When that's done, you can move on to finish your pillow in Lesson Five.
![]()
Modknit | Lessons | Lesson 1 | Lesson 2 | Lesson 3 / 3a / 3b | Lesson 4 | Lesson 5
![]()
Text and Images Copyright 2000-2002 Katherine Matthews (except where otherwise noted)
This page last modified 11 December 2002